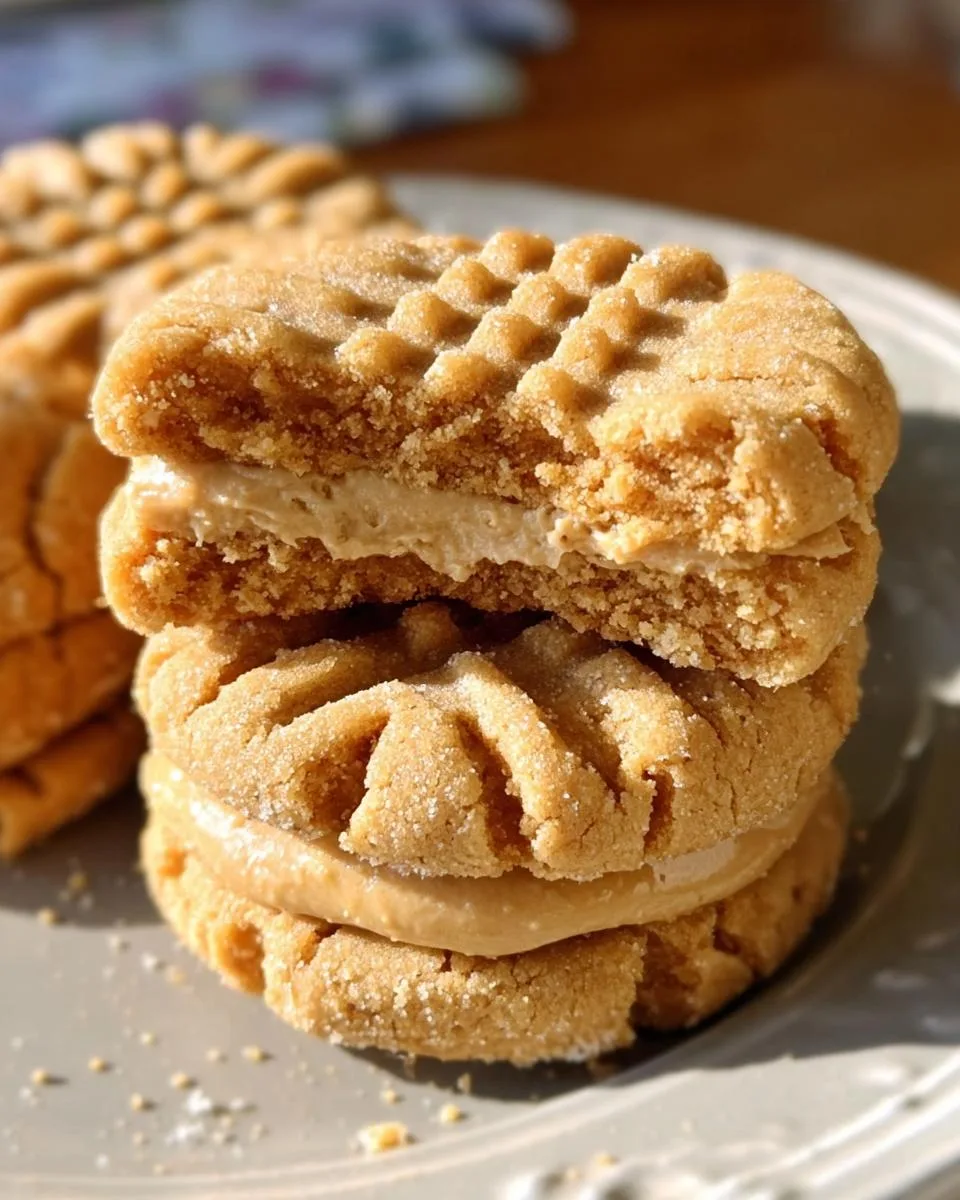
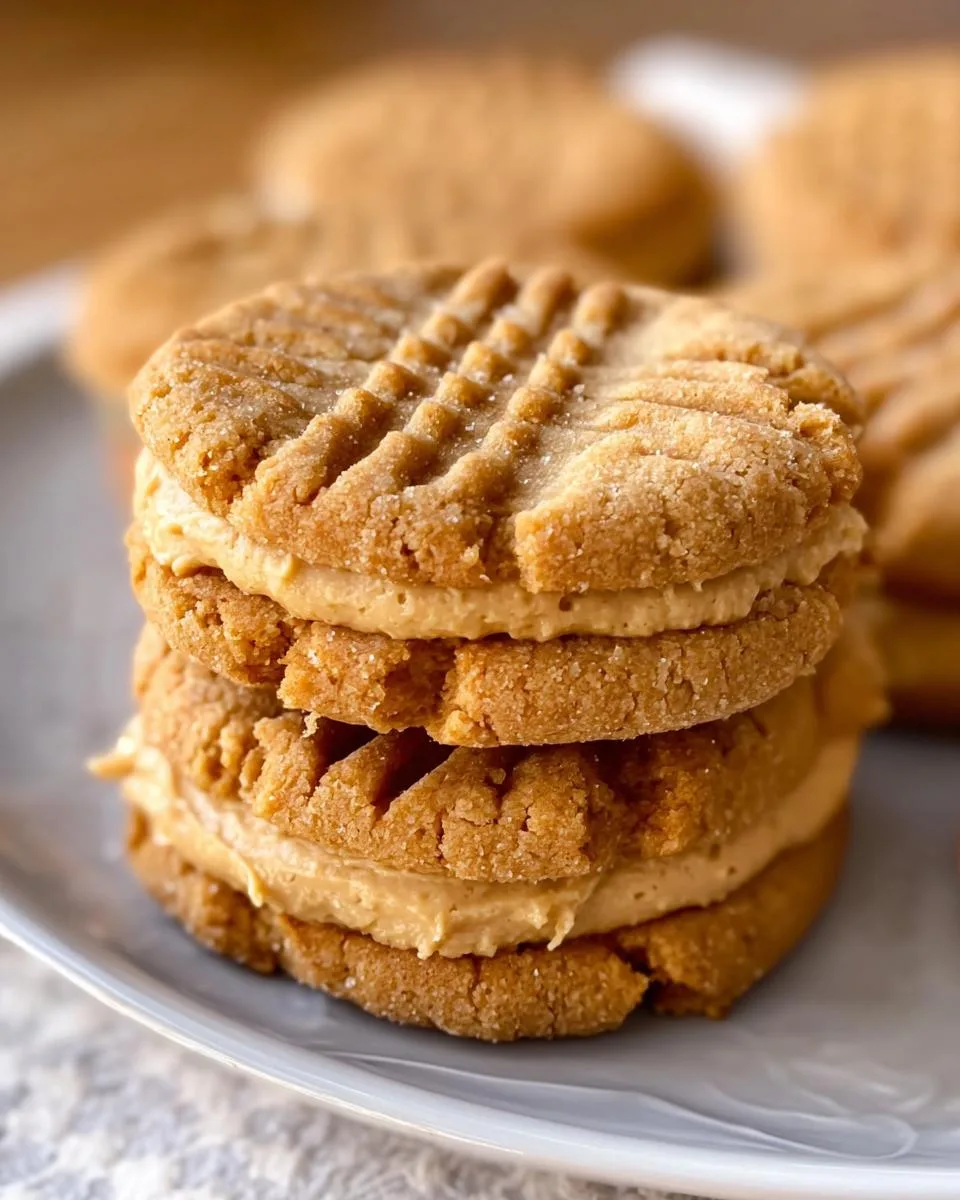
Are you craving that perfect peanut butter cookie with a sweet, creamy filling? These homemade Nutter Butter cookies are your answer. They taste just like the classic, but even better because you made them yourself.
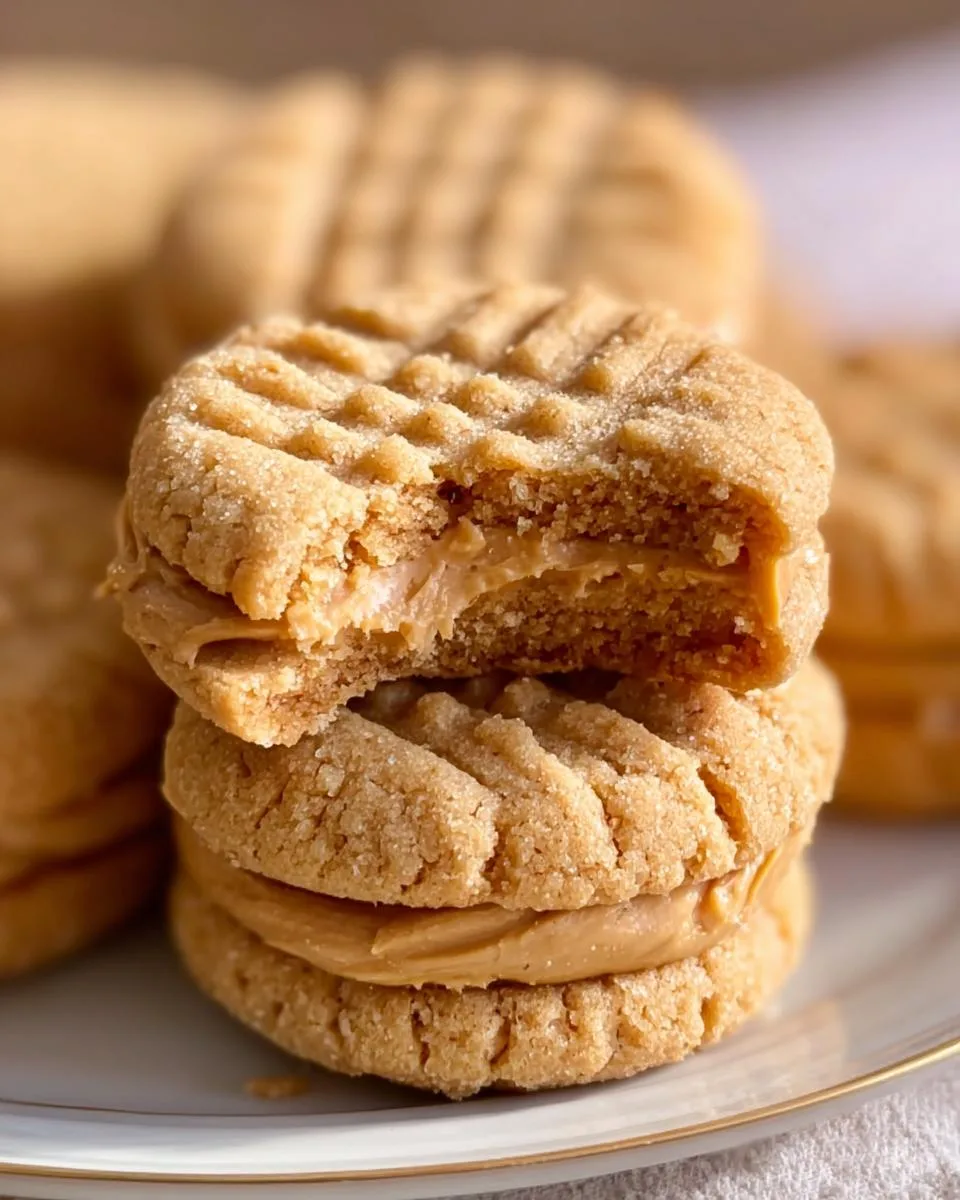
The secret to a great Nutter Butter isn’t a mystery ingredient. It’s all about the shape and that fluffy peanut butter filling. This recipe is my go-to for bake sales and cozy afternoons when the kids need a treat. I love how the simple fork-press and pinch turns basic dough into a cute little peanut.
First, let’s walk through the recipe. You’ll see just how easy it is to make these iconic sandwich cookies from scratch.
Table of Contents
Why You’ll Love These Homemade Nutter Butter Cookies
This copycat recipe delivers everything you want from a classic peanut butter sandwich cookie, but with the cozy satisfaction of baking them yourself. Here’s why it’s become a staple in my kitchen.
- Spot-on flavor and texture: These cookies have that perfect balance of crisp edge and soft center, with a sweet, fluffy filling that’s pure nostalgia.
- Fun and forgiving to make: No cookie cutters needed. Shaping the dough into little peanuts with a fork is a fun, hands-on step that kids love to help with.
- Better than store-bought: You control the ingredients, meaning no preservatives and the rich, real peanut butter flavor shines through.
- Perfect for sharing: This recipe makes a full two dozen sandwich cookies, ideal for gifting, potlucks, or stashing in the cookie jar for after-school snacks.
- Surprisingly simple: If you can cream butter and sugar, you can make these. I’ve tested this method countless times to ensure it works in real, busy home kitchens.
Once you taste a warm, homemade Nutter Butter, the packaged version just won’t compare. Let’s gather your ingredients.
Ingredients You’ll Need for Nutter Butter Cookies
Gathering your ingredients is the first step to peanut butter bliss. Here’s your simple shopping list, broken down into the cookie dough and the creamy filling.
For the Cookie Dough:
- 1 ½ cups all-purpose flour: This gives our cookies structure. Spoon and level it into your measuring cup for accuracy; packing it down can make the dough tough.
- 1 teaspoon baking soda: Our leavening agent for a little lift and the perfect slight spread.
- ¼ teaspoon kosher salt: Balances the sweetness and makes the peanut butter flavor pop. If using table salt, use just a pinch.
- ½ cup unsalted butter, softened: Take it out of the fridge about an hour ahead. It should be cool to the touch but yield easily when pressed. This creams perfectly with the sugar.
- 1 cup light brown sugar: Adds moisture and a hint of molasses flavor for a richer, softer cookie.
- 1 cup creamy peanut butter: Use a standard, no-stir variety like Jif or Skippy for consistent texture and sweetness. Natural peanut butter can make the dough oily.
- 1 large egg: Binds everything together. Crack it into a small bowl first to avoid any shells.
- ½ teaspoon pure vanilla extract: The flavor enhancer. Pure extract makes a difference here.
- ½ cup granulated sugar: For rolling! This gives the cookies their classic sparkly, crunchy exterior.
For the Peanut Butter Filling:
- ¼ cup unsalted butter, softened: Again, proper softening is key for a fluffy, pipeable filling.
- ½ cup creamy peanut butter: Use the same type as in the dough for consistent flavor.
- 1 ½ cups powdered sugar: Sift it if it’s lumpy for the smoothest filling possible.
- 2 tablespoons milk: Any kind you have works—whole, 2%, or even a non-dairy alternative. This loosens the filling to the perfect spreadable consistency.
- ¼ teaspoon vanilla extract: A final flavor boost for the filling.
A quick note: if you only have salted butter, that’s okay. Just omit the added salt in the cookie dough. Now, let’s turn this simple list into something magical.
How to Make Homemade Nutter Butter Cookies
Ready to bake? This process is straightforward and fun. Follow these steps for cookies that look and taste like the classic treat.
Step 1: Prep Your Dough
First, preheat your oven to 350°F. Line your baking sheets with parchment paper or silicone mats. This prevents sticking and makes cleanup a breeze. Pour your ½ cup of granulated sugar into a small bowl and set it aside for rolling.
In a medium bowl, whisk together your flour, baking soda, and salt. Give it a good mix so the leavening agent is evenly distributed. In a large bowl, use a hand mixer or stand mixer to cream the softened butter, brown sugar, and peanut butter. Mix on medium speed for 2-3 minutes until it’s light, fluffy, and well combined.
Beat in the egg and vanilla extract until smooth. Now, with your mixer on low, gradually add the dry ingredients. Mix just until no dry streaks of flour remain. Overmixing can lead to tough cookies, so stop as soon as the dough comes together.
Step 2: Shape Your Nutter Butter Cookies
This is the fun part. Use a cookie scoop or a tablespoon to portion the dough. Each ball should be about 1 ½ tablespoons. Roll each portion into a smooth ball between your palms.
Now, shape each ball into a small log, about 2 inches long. Roll each log generously in the bowl of granulated sugar, coating all sides. Place the sugared logs on your prepared baking sheet, spacing them about 2 inches apart. They will spread a little.
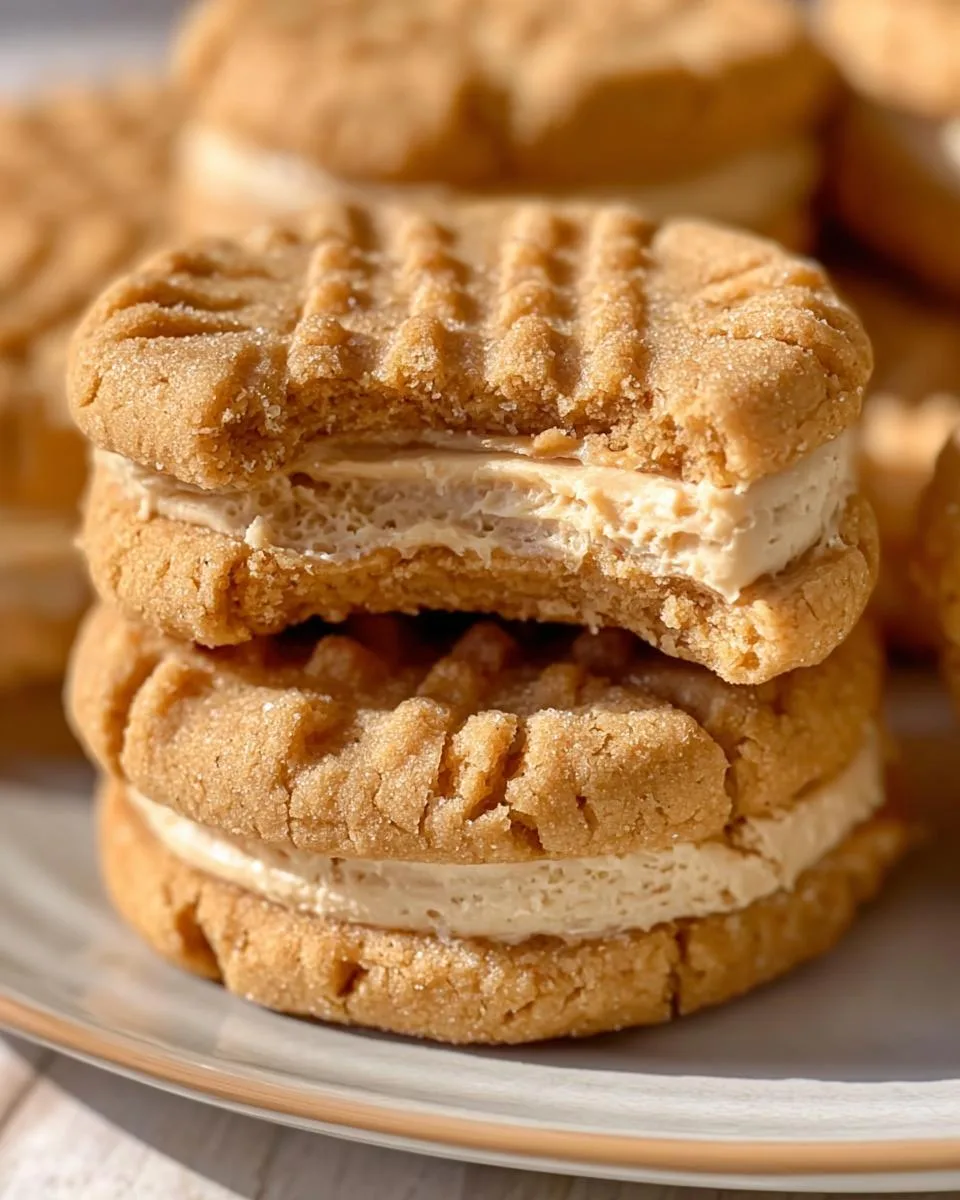
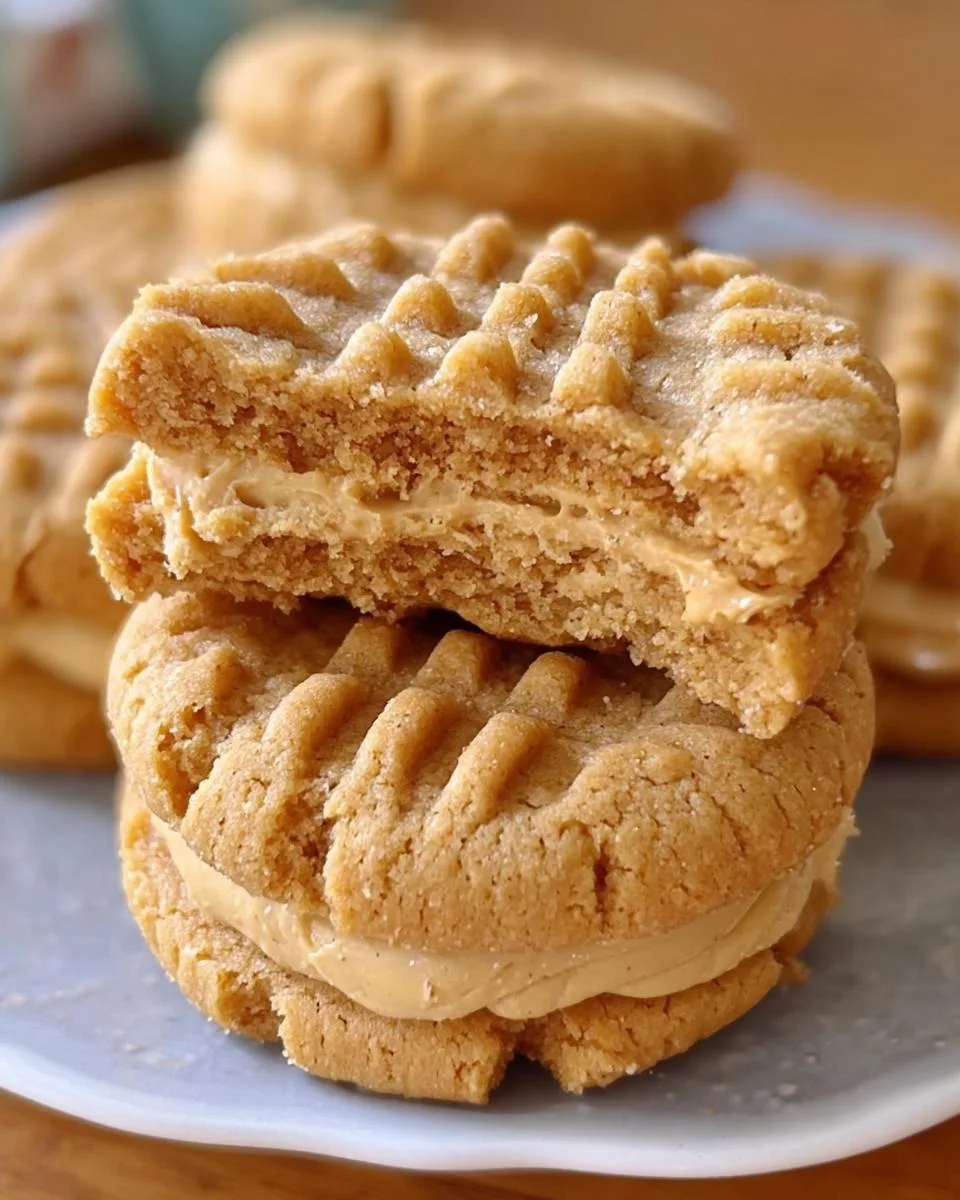
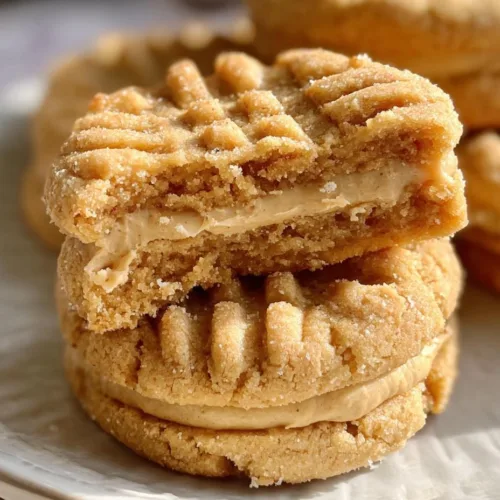
Take a fork and gently press it into the top of a dough log to make parallel lines. Turn the fork 90 degrees and press again to create the classic criss-cross pattern. Finally, gently pinch the middle of the cookie to form a slight waist, giving it that iconic peanut shape.
Step 3: Bake to Peanut Butter Perfection
Bake your cookies for 10 to 12 minutes. Watch for the edges to turn a light golden brown. The centers will still look soft and puffy; that’s perfect. They will firm up as they cool.
Do not overbake them if you want that soft, chewy center. When they’re done, let the cookies cool on the hot baking sheet for 5 full minutes. This allows them to set. Then, use a spatula to carefully transfer them to a wire rack to cool completely. The cookies must be completely cool before you add the filling, or it will melt.
Step 4: Whip Up the Peanut Butter Filling
While the cookies cool, make the filling. In a clean bowl, beat the softened butter and peanut butter together on medium speed for 2 minutes until it’s very smooth and creamy.
Add the powdered sugar, milk, and vanilla extract. Start mixing on low speed so the sugar doesn’t fly everywhere. Once combined, increase the speed to medium-high and beat for another 1-2 minutes. You’re done when the filling is fluffy, light in color, and holds its shape.
Step 5: Assemble the Sandwich Cookies
Match your cooled cookies into pairs of similar size. Turn one cookie from each pair over so the flat bottom is facing up.
Scoop about 1 tablespoon of filling onto the bottom cookie. You can use a spoon or a piping bag for neatness. Gently place the second cookie on top, flat side down, and press lightly until the filling spreads just to the edges. Your homemade Nutter Butter cookies are ready to enjoy!
Pro Tips for the Best Nutter Butter Cookies
These little tricks are what separate a good cookie from a great one. They come straight from my kitchen, learned through many happy batches.
- Chill your dough if it’s sticky: If your dough feels too soft to shape after mixing, don’t add more flour. Just cover the bowl and pop it in the fridge for 15-20 minutes. This firms up the butter, making the logs much easier to handle and roll in sugar.
- Use a ruler for uniform logs: For cookies that look like they came from a bakery, aim for logs that are 2 inches long. This ensures they bake evenly and all your sandwich pairs match up perfectly.
- Press, don’t smash, with the fork: When making the criss-cross pattern, press the fork tines just deep enough to make clear lines. Pressing all the way through can flatten the cookie too much and prevent that perfect peanut shape.
- Allison’s secret for extra flavor: For a deeper, toastier peanut flavor, use ¼ cup of the peanut butter in the filling straight from a freshly opened jar, and toast the other ¼ cup in a dry pan for 2-3 minutes until fragrant before adding it to the dough. It makes a world of difference.
- Refresh leftover cookies: If your cookies lose their crispness after a day or two, place them in a single layer on a baking sheet and warm them in a 300°F oven for 3-4 minutes. Let them cool, and the filling will re-set. They’ll taste freshly baked.
With these tips in your back pocket, you’re guaranteed a flawless batch every single time.
Common Mistakes to Avoid
Even the simplest recipes have little pitfalls. Here are the most common ones I’ve seen (and made myself!) with this Nutter Butter recipe, and exactly how to steer clear of them.
- Using the wrong peanut butter: Natural peanut butter that separates will make your dough greasy and your filling runny. How to fix it: Stick with a standard, stabilized creamy peanut butter like Jif or Skippy for perfect consistency every time.
- Over-baking the cookies: It’s easy to think they need more time because the centers look soft. How to fix it: Pull them out when the edges are just lightly golden. They will set up perfectly as they cool on the hot baking sheet.
- Assembling with warm cookies: If the cookies are even slightly warm, the creamy filling will melt into a messy puddle. How to fix it: Be patient. Let them cool completely on a wire rack. This is the perfect time to make the filling.
- Over-mixing the dough: Once you add the flour, mixing too much develops gluten, leading to tough cookies. How to fix it: Mix the dry ingredients in on low speed just until you no longer see streaks of flour. A few tiny flour spots are okay.
- Not pinching the waist: Skipping the pinch in the middle means you get a log, not a peanut. How to fix it: After the fork press, just gently squeeze the middle of the cookie dough with your fingers. It takes one second and makes all the difference.
Don’t panic if your first few shapes are a little wonky. They will still taste incredible, and you’ll get the hang of it by the second tray.
Delicious Variations
Once you’ve mastered the classic, try one of these fun twists. They’re an easy way to make this recipe your own.
- Chocolate-Dipped Nutter Butters: Melt 1 cup of semi-sweet chocolate chips with a teaspoon of coconut oil. Dip one half of each assembled cookie in the chocolate, let the excess drip off, and place on parchment paper to set. It’s a decadent upgrade.
- Peanut Butter & Jelly: Add a tiny dollop (about ½ teaspoon) of your favorite jam or jelly in the center of the peanut butter filling before sandwiching the cookies. Raspberry or strawberry jam works beautifully for that classic flavor combo.
- Crunchy Peanut Butter Version: Swap the creamy peanut butter in the cookie dough for a crunchy variety. You’ll get those delightful little peanut bits in every bite for extra texture.
- “Funfetti” Filling: Mix 2-3 tablespoons of rainbow sprinkles into the peanut butter filling before assembling. It’s a festive, colorful surprise that kids absolutely adore.
- Mini Nutter Butters: For party snacks, use a ½ tablespoon scoop to make tiny dough balls. Shape into mini logs, press with a fork, and bake for 8-9 minutes. Fill with a small amount of filling for adorable, bite-sized treats.
Don’t be afraid to play around. The best part of baking at home is making it exactly how you like it.
Serving Suggestions
These homemade Nutter Butter cookies are a star all on their own with a cold glass of milk. But they also make any moment feel special. Here are my favorite ways to serve them up.
- The Classic After-School Snack: Pile a few cookies on a plate with a big glass of cold milk. It’s the perfect energy boost for homework time.
- Picnic or Potluck Perfection: Pack them in a container for your next outing. They’re sturdy, don’t need refrigeration, and are always the first treat to disappear from the dessert table.
- Grown-Up Coffee Break: Pair a cookie with a hot cup of black coffee or a latte. The sweet, salty peanut butter is amazing with the bitterness of the coffee.
- Ice Cream Sandwich Upgrade: Let a cookie soften for a minute, then use two to sandwich a scoop of vanilla ice cream. Roll the edges in mini chocolate chips for a next-level dessert.
- Lunchbox Love Note: Tuck one into a lunchbox as a sweet surprise. They travel well and bring a smile every time.
Whether it’s a quiet Tuesday or a big family gathering, these cookies always fit right in.
FAQs About Homemade Nutter Butter Cookies
Can I make these cookies ahead of time?
Absolutely. You can bake the cookie layers up to 3 days in advance. Store them in an airtight container at room temperature. Make the filling and assemble the sandwiches the day you plan to serve them for the freshest texture.
What’s the best peanut butter to use?
Use a standard, creamy peanut butter like Jif or Skippy. These are stabilized and won’t separate, giving you a perfect dough and a fluffy, pipeable filling every time. Avoid natural or oily peanut butters.
How do I know when the cookies are done baking?
The cookies are done when the edges are set and lightly golden brown. The centers will still look soft and puffy. They will firm up perfectly as they cool on the hot baking sheet for 5 minutes.
My filling is too runny/thick. How do I fix it?
If it’s runny, mix in more sifted powdered sugar, one tablespoon at a time. If it’s too thick and crumbly, add more milk, one teaspoon at a time, until it’s smooth and spreadable. Consistency is key for easy assembly.
How many calories are in a homemade Nutter Butter cookie?
Each sandwich cookie is approximately 250 calories. Please note this is an estimate; nutritional values can vary based on the specific brands and exact measurements of ingredients you use.
How should I store leftover cookies?
Store assembled cookies in a single layer in an airtight container at room temperature for up to 5 days. For longer storage, you can freeze the unfilled cookie layers for up to 2 months.
Time to Try These Nutter Butter Cookies
There you have it. Your own batch of perfect homemade Nutter Butter cookies, ready to fill your kitchen with that sweet, peanut butter aroma. This recipe proves you don’t need a fancy package to enjoy a classic treat. Nothing beats the pride of sharing something you baked with love.
I’d love to hear how your cookies turned out. Did your family gobble them up? Did you try a fun variation? Tell me all about it in the comments below. For more easy, joyful recipes like this one, come follow along with me on Pinterest. Now, go grab a cookie and a glass of milk. You’ve earned it.
Homemade Nutter Butter Cookies
Equipment
- Standing mixer or electric hand mixer
- Baking sheet
- Parchment paper or silicone baking mat
- Mixing bowls
- Wire rack
Ingredients
Cookie Ingredients
- 1 ½ cups all purpose flour
- 1 teaspoon baking soda
- ¼ teaspoon kosher salt
- ½ cup unsalted butter softened
- 1 cup light brown sugar
- 1 cup creamy peanut butter
- 1 large egg
- ½ teaspoon pure vanilla extract
- ½ cup sugar for rolling
Peanut Butter Filling
- ¼ cup unsalted butter softened
- ½ cup creamy peanut butter
- 1 ½ cups powdered sugar
- 2 Tablespoons milk
- ¼ teaspoon vanilla extract
Instructions
- Preheat your oven to 350°F. Line a cookie sheet with parchment paper or a silicone baking mat. Pour the 1/2 cup of sugar into a small bowl and set it aside.
- Whisk the flour, baking soda, and salt together in a mixing bowl. Set this aside.
- Using a standing mixer or electric hand mixer, cream the softened butter, brown sugar, and peanut butter together.
- Add the egg and vanilla to the wet mixture and continue mixing until combined.
- Gradually add the dry ingredients to the wet ingredients. Mix just until the dough comes together.
- Divide the dough into small balls, using about 1 1/2 tablespoons of dough for each one.
- Form each ball into a log shape. Roll each log in the bowl of sugar to coat it.
- Place the sugared dough logs on your prepared cookie sheet, spacing them about 2 inches apart.
- Use the tines of a fork to press a criss-cross pattern into the top of each dough log. Then, gently pinch the middle of each cookie to create a peanut shape.
- Bake the cookies for 10 to 12 minutes, until the edges are lightly browned but the centers are still soft.
- Let the cookies cool on the baking sheet for 5 minutes. Then transfer them to a wire rack to cool completely.
- To make the filling, beat the softened butter and peanut butter together in a standing mixer on medium speed until the mixture is fluffy.
- Mix in the powdered sugar, milk, and vanilla extract until the filling is smooth.
- Group your cooled cookies into pairs. Spoon about 1 tablespoon of the peanut butter filling onto the bottom cookie of each pair.
- Place the second cookie on top of the filling to create a sandwich. Press gently to secure.