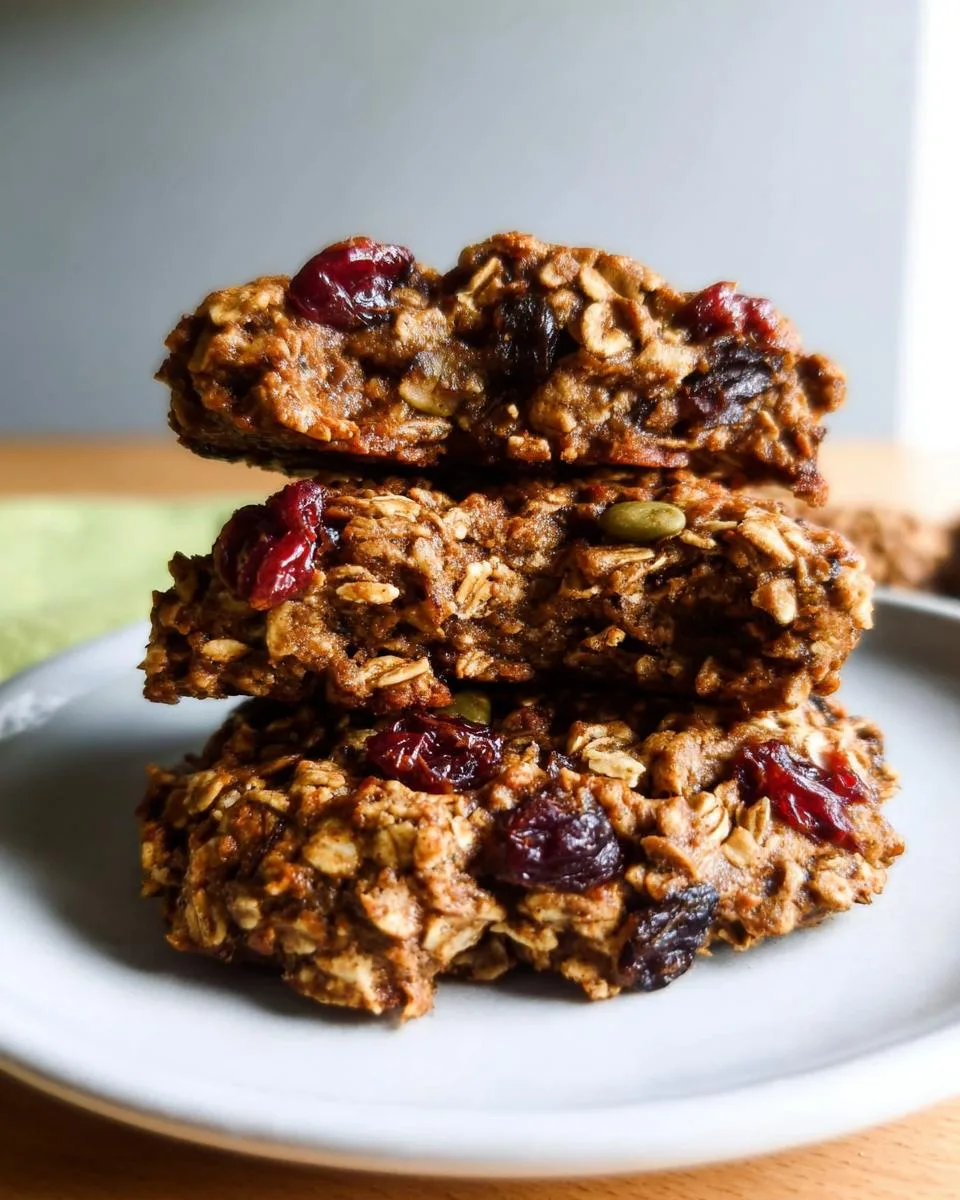
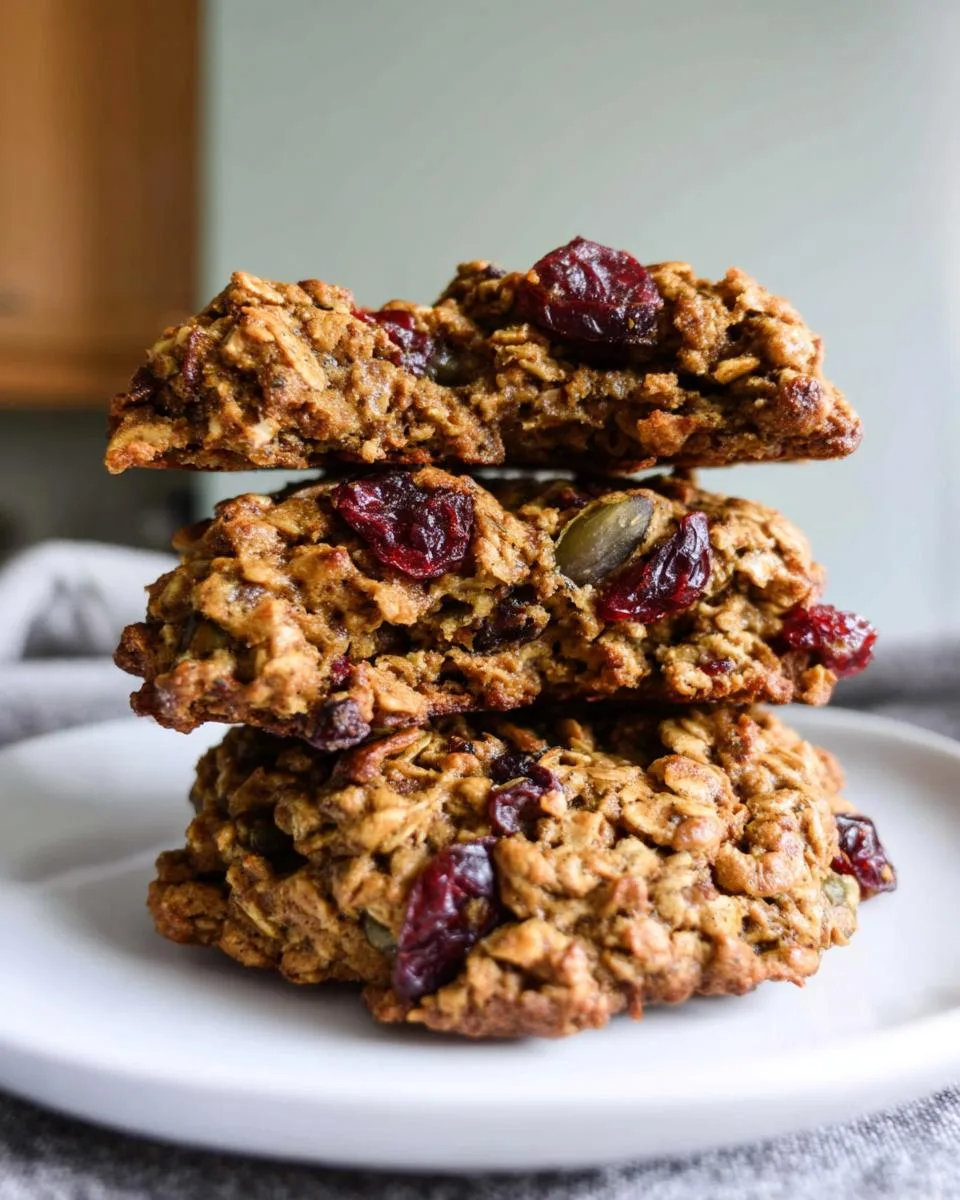
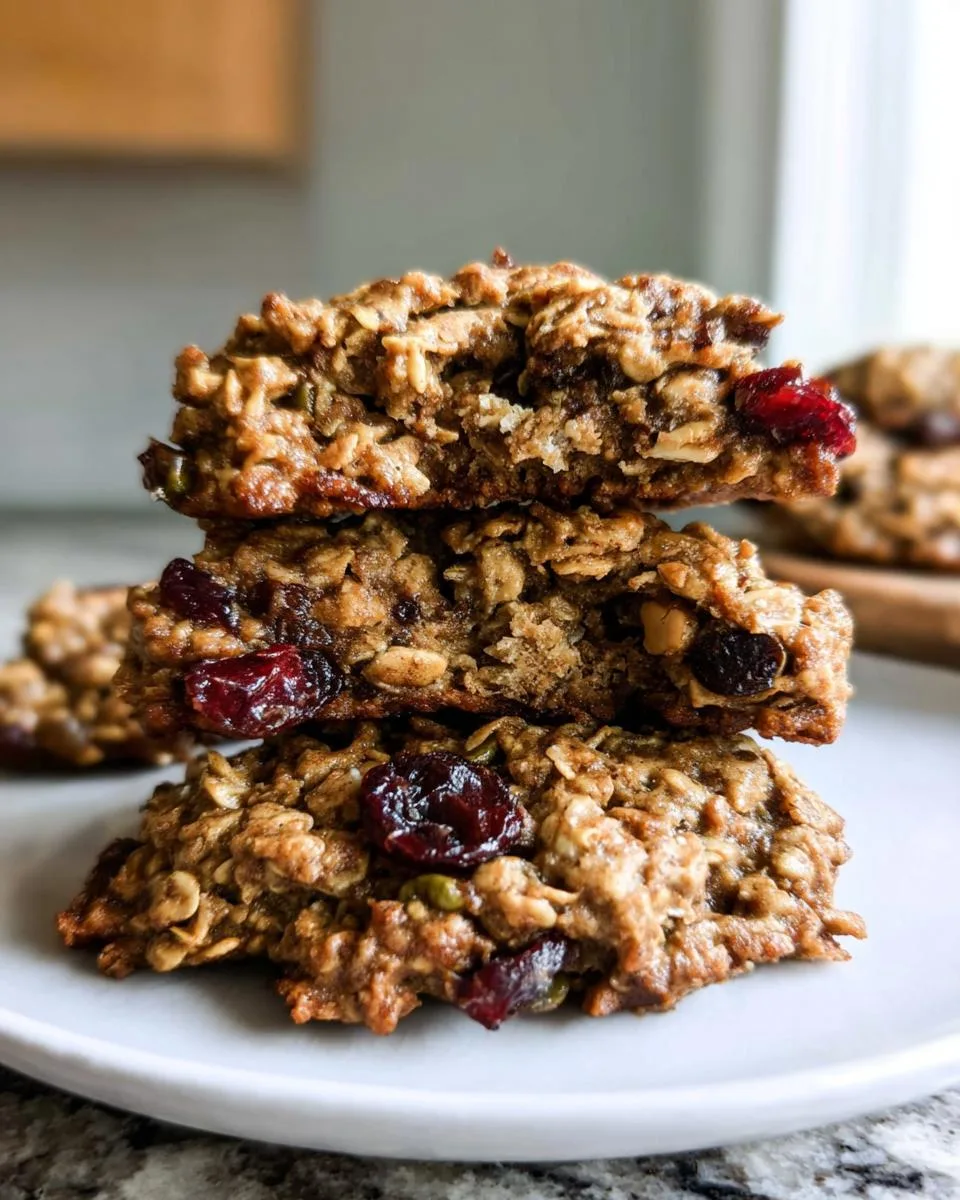
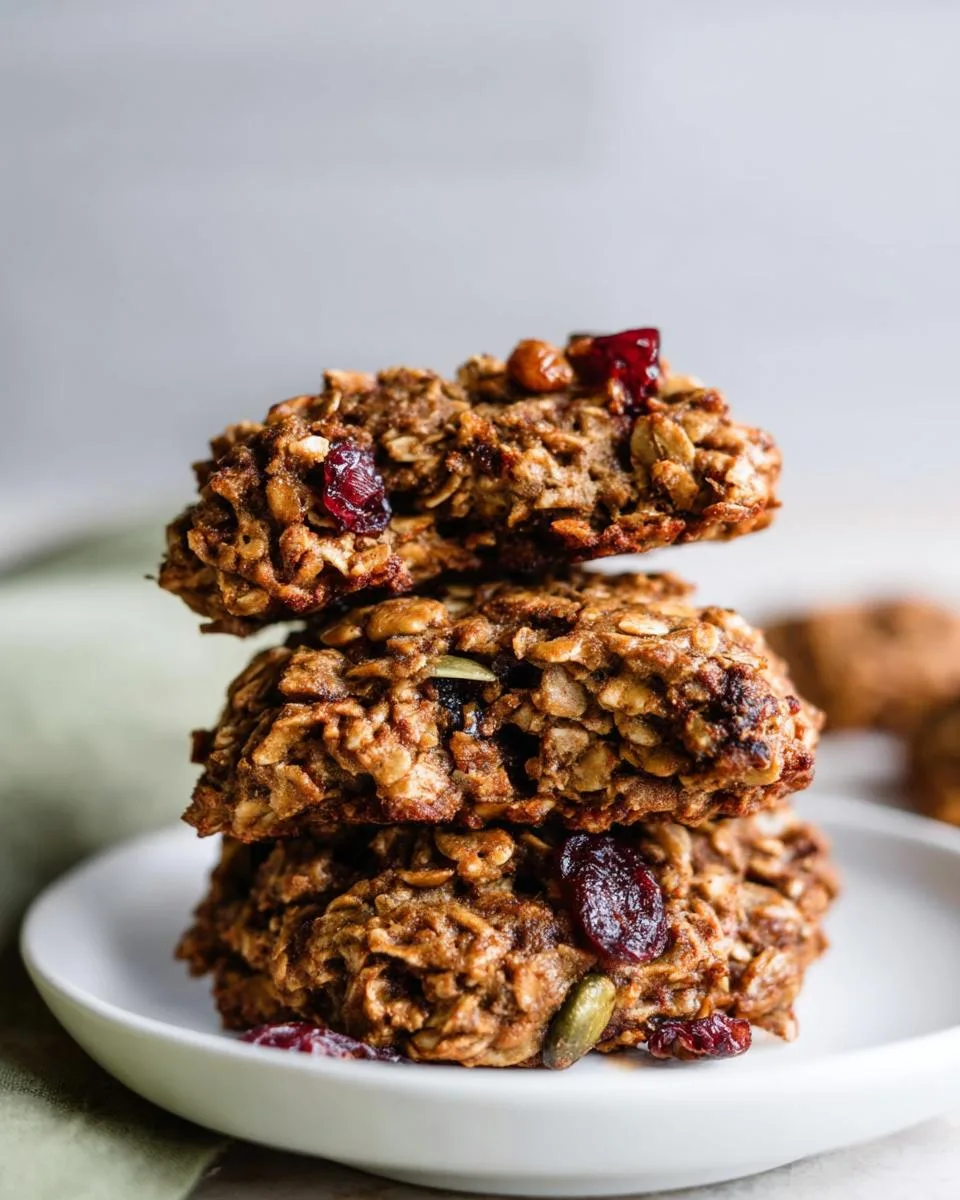
Mornings are chaotic. You need breakfast that fuels you, fast. These wholesome Breakfast Cookies are the answer. They are chewy, satisfying, and packed with real ingredients like oats, almond butter, and banana.
For years, I tested recipes to find the perfect balance. The secret to a great breakfast cookie isn’t complicated, it’s about texture and substance, not just sweetness. These are the cookies I grab with my coffee when the day starts in a rush.
They feel like a treat but work like a meal. Let’s walk through how to make them.
Table of Contents
Why You’ll Love These Breakfast Cookies
Let me tell you why this recipe earned a permanent spot in my kitchen. These are not a sneaky dessert. They are a legit, hold-you-over-until-lunch kind of meal.
- Real Morning Fuel: They give you lasting energy from hearty oats, healthy fats in the nut butter, and fiber from the mix-ins. You will feel satisfied, not spiked and crashed.
- Meal Prep Magic: Make a batch on Sunday. Your future self will thank you every single rushed Monday, Tuesday, and Wednesday morning. Grab one and go.
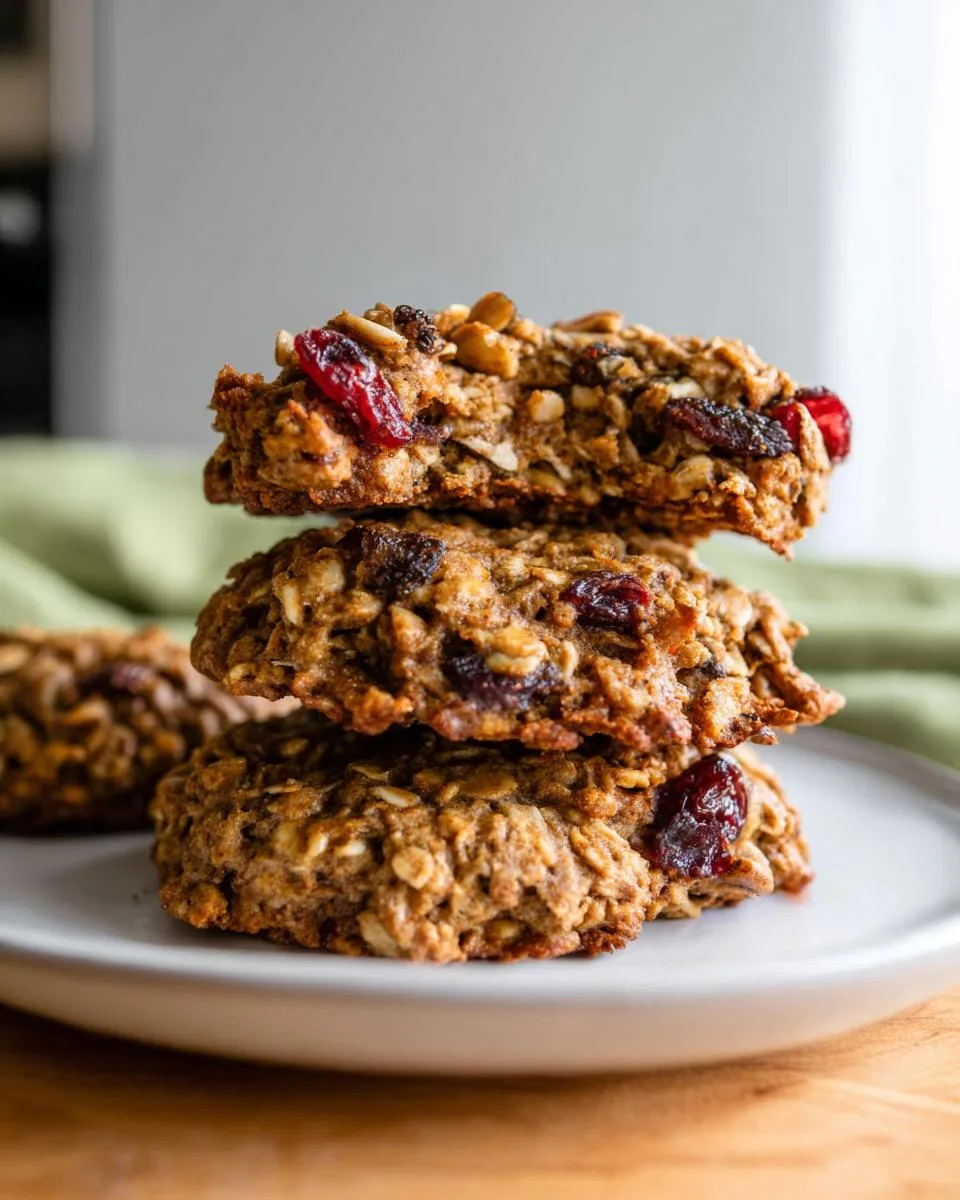
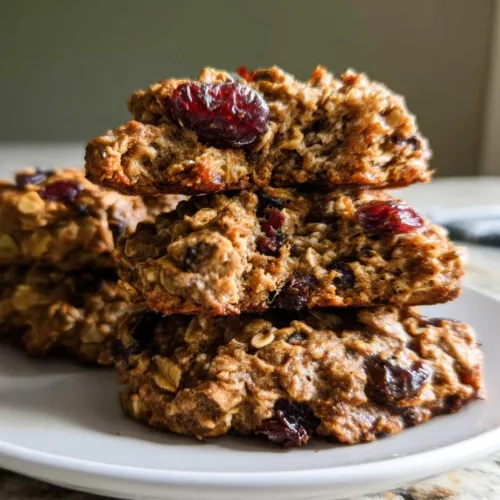
- Perfect Texture: They bake up chewy and substantial, with a little crunch from the seeds. They hold together beautifully without any refined flour or white sugar.
- Naturally Sweet: The ripe banana and pure maple syrup create a delicious, not-too-sweet flavor that both my kids and I love. No sugar rush, just good taste.
- Your Kitchen, Your Rules: Use what you have. Swap peanut butter for almond, raisins for cranberries, or skip the nuts. The formula is forgiving and flexible.
- Freezer-Friendly: I always double the batch. Half goes in the fridge for the week, half in the freezer for a busy month. They thaw perfectly by lunchtime.
This recipe is my secret weapon for calm mornings. It turns pantry staples into reliable, delicious fuel.
Ingredients You’ll Need
These simple pantry staples come together to create a powerhouse breakfast. Precise measurements here ensure the perfect, chewy texture we love.
- Dry Ingredients:
- 2 cups rolled oats: Use old-fashioned or quick-cooking oats, not instant. Instant oats get mushy and ruin the cookie’s heartiness.
- 1/2 teaspoon ground cinnamon: This warm spice is essential for that cozy breakfast flavor.
- 1/4 teaspoon salt: A little salt makes all the other flavors, especially the natural sweetness, really pop.
- Wet Ingredients:
- 1 cup smooth almond butter: This is our glue and protein source. You can use peanut butter too. Make sure to pack it into the measuring cup.
- 1/3 cup pure maple syrup: Pure syrup gives better flavor than pancake syrup. It adds moisture and a rich sweetness.
- 1/4 cup unsweetened applesauce: This magic ingredient keeps the cookies incredibly tender without any added oil.
- 1/2 cup mashed ripe banana: Measure this! One medium, very ripe banana mashed well gives natural sweetness and binds the dough.
- Mix-Ins:
- 1/2 cup dried cranberries: They add little bursts of tangy sweetness. Dried cherries work great too.
- 1/2 cup raw pepitas (pumpkin seeds): For a wonderful crunch. Sunflower seeds are a perfect substitute.
- 1/4 cup chopped walnuts (optional): I add these for extra crunch and healthy fats. Leave them out if you need a nut-free version.
That is truly it. No flour, no refined sugar, just real food that makes your morning better.
How to Make Breakfast Cookies
This process is wonderfully simple. Follow these steps for perfect, chewy breakfast cookies every single time. My top tip? Preheat your oven right away. It needs to be ready when you are.
Step 1: Prep Your Station
Gather all your ingredients. This makes the process smooth. Line two large baking sheets with parchment paper. Preheat your oven to 325°F (163°C). This lower temperature is key. It bakes the cookies through without burning the bottoms.
Step 2: Combine the Dry Base
Grab a large mixing bowl. Add your two cups of rolled oats, cinnamon, and salt. Give it a good stir with a spoon. You want every oat flake to get a little kiss of cinnamon. This ensures every bite is perfectly spiced.
Step 3: Create the Dough
Now, add all your wet ingredients to the bowl. That is the almond butter, maple syrup, applesauce, and mashed banana. Here is where you roll up your sleeves. Use a sturdy spoon or clean hands to mix. You will mix until no dry oats remain and a thick, sticky dough forms. It should hold together when you press it.
Step 4: Fold in the Mix-Ins
Add your dried cranberries, pepitas, and chopped walnuts if using. Gently fold them into the dough. Stop once they are evenly distributed. Overmixing here can make the cookies dense. If your dough feels too wet and sloppy, add one tablespoon of oats. If it seems dry and crumbly, add one teaspoon of applesauce.
Step 5: Shape the Cookies
Use a 1/4-cup measuring scoop for perfect portions. Scoop the dough and drop mounds onto your prepared baking sheets. Space them about 2 inches apart. These cookies do not spread like traditional ones. Flatten each mound gently with your palm or the back of a spoon to about 3/4-inch thick. This helps them bake evenly.
Step 6: Bake to Perfection
Place the sheets in your preheated oven. Bake for 16 to 19 minutes. Look for the edges to turn a light, golden brown. The tops should look set and dry to the touch. They will still feel soft in the center, but that is perfect. They firm up as they cool. Do not overbake them if you want that soft, chewy center.
Step 7: The Crucial Cool Down
This step is non-negotiable. Let the cookies cool on the baking sheet for a full 10 minutes. They are very fragile when hot. This rest time lets them set and firm up. After 10 minutes, carefully transfer them to a wire rack to cool completely. They hold together best once fully cooled. Then, they are ready to fuel your day.
Pro Tips for the Best Breakfast Cookies
After making countless batches, I’ve learned a few secrets. These simple tips guarantee perfect texture and flavor every time you bake.
- Measure, Don’t Guess: For the mashed banana, use a measuring cup. A heaping or scant half-cup can throw off the dough’s moisture, making it too sticky or too dry.
- Pack that Butter: When measuring almond or peanut butter, press it firmly into the cup. This ensures you get the full amount needed for binding. A skimpy cup means crumbly cookies.
- Rotate for Even Color: If your oven bakes unevenly, rotate the baking sheets front-to-back halfway through baking. This prevents some cookies from getting too dark on the edges.
- Cool Completely: Patience is key. Let cookies cool fully on the wire rack before you store them. Trapped steam turns them soggy. A fully cooled cookie is a sturdy, chewy cookie.
- Use a Scoop: A 1/4-cup cookie or ice cream scoop is my favorite tool. It creates uniform cookies that bake at the same rate, and it’s much faster and less messy than using spoons.
- Allison’s Secret: For an extra flavor boost, toast your pepitas and walnuts in a dry pan for a few minutes before adding them to the dough. It makes the nutty taste incredible.
Follow these tips, and you’ll have a batch of hearty, bakery-worthy breakfast cookies ready for your week.
Common Mistakes to Avoid
Even the best recipes have little pitfalls. Knowing what to watch for saves you from disappointment. Here are the main stumbles I see and exactly how to sidestep them.
- Using Instant Oats: This is the biggest texture wrecker. Instant oats are pre-cooked and powdery. They absorb too much moisture and turn your cookies into a mushy, dense brick. The fix is simple. Always grab old-fashioned rolled oats or quick-cooking oats. They give you that perfect, chewy heartiness.
- Overmixing the Dough After Adding Mix-Ins: We all want those cranberries and seeds spread evenly. But if you keep stirring aggressively, you develop too much starch. This makes the cookies tough and dense. The fix is gentle. Fold the mix-ins in just until you see no big clumps. A few stragglers are okay.
- Skipping the Flattening Step: These are not butter-and-sugar cookies. They will not spread out on their own. If you leave them as tall mounds, the outside can burn before the raw, doughy center bakes through. The fix is easy. Gently press each scoop into a 3/4-inch thick disc. This gives you an even, perfectly baked cookie.
- Transferring Cookies Too Soon: When you pull them from the oven, they are still setting. They seem firm on top but are fragile underneath. Moving them right away can cause them to break apart. The fix requires patience. Let them cool on the hot baking sheet for the full 10 minutes. This lets them firm up so you can move them in one piece.
Avoid these four common errors, and your batch will turn out perfectly chewy and sturdy every single time.
Delicious Variations
One of my favorite things about this breakfast cookie dough is its flexibility. It is a perfect blank canvas for your pantry and cravings. Once you master the base recipe, have fun playing with these easy swaps.
- Tropical Twist: Swap the dried cranberries for 1/2 cup of chopped dried mango. Fold in 1/4 cup of unsweetened shredded coconut with the seeds. It feels like a mini vacation in every chewy bite.
- Chocolate Chip Delight: For a feel-good treat, use 1/2 cup of dark chocolate chips or chunks instead of the cranberries. The melty pockets of chocolate make these extra special for weekend mornings.
- Sunflower Crunch: Need a nut-free version? Replace both the pepitas and the optional walnuts with 3/4 cup of raw sunflower seeds. You still get that wonderful, satisfying crunch in every cookie.
- Different Butter: Do not hesitate to try cashew butter for a richer, creamier flavor. For a totally nut-free option, sunflower seed butter works beautifully. The method stays exactly the same, just know the final taste will be uniquely yours.
Mixing and matching is half the fun. Let me know what combination you create in your kitchen.
Serving Suggestions
These cookies are so much more than a quick bite. Their hearty, chewy texture and balanced flavor make them a versatile star for any time of day. Here are my favorite ways to serve them up.
- The Classic On-the-Go Breakfast: Grab a cookie and a whole apple or banana on your way out the door. It is a complete, no-fuss meal that actually keeps you full until lunch.
- Afternoon Power-Up: Beat the 3 PM slump by pairing a cookie with a scoop of Greek yogurt. The protein from the yogurt and the fiber from the cookie make the perfect satisfying snack.
- Post-Workout Fuel: Enjoy one with a cold glass of milk or your favorite fruit smoothie. The combo of carbs, protein, and healthy fats is ideal for recovery.
- Lunchbox Star: Tuck a cookie into a lunchbox next to a sandwich or some leftovers. It adds a wholesome, sweet note that feels like a treat but is packed with good stuff.
- Weekend Brunch Side: For a casual gathering, arrange them on a platter with a bowl of fresh berries and a pot of coffee. They are a crowd-pleaser that feels special but is secretly easy.
However you serve them, these cookies are ready to make your day a little easier and a lot more delicious.
FAQs About Breakfast Cookies
Can I make these gluten-free?
Yes, you absolutely can. The only ingredient to check is the oats. Simply make sure your rolled oats are certified gluten-free. All other ingredients are naturally gluten-free, so you are good to go.
How should I store breakfast cookies?
Store your cooled cookies in an airtight container at room temperature. They stay perfectly chewy and fresh for up to 4 days. I keep mine right on the counter for easy grabbing.
Can I freeze breakfast cookies?
Absolutely, and I highly recommend it. First, freeze the baked cookies in a single layer on a baking sheet. Once solid, transfer them to a freezer bag. They will keep for up to 3 months. Thaw at room temperature or pop one straight into a lunchbox.
My dough is too crumbly. What can I do?
Do not worry, this is an easy fix. Your nut butter might be extra thick or your banana a bit small. Add an extra tablespoon of mashed banana or unsweetened applesauce, one teaspoon at a time, and mix. Stop as soon as the dough holds together when pressed.
What are the nutrition facts for these cookies?
These are wholesome cookies, but exact nutrition varies with your specific brands. Per cookie, you can expect roughly 250-300 calories. They provide a good balance of fiber from the oats, protein from the nut butter, and healthy fats from the seeds. For precise counts, I use an online nutrition calculator with my exact ingredients.
Bake, Share, and Enjoy!
These Breakfast Cookies are your secret weapon for busy days. They turn simple ingredients into real food energy wrapped in a delicious, chewy package. They prove a good breakfast can be both quick and deeply nourishing. Now you have the recipe, the tips, and all the confidence you need. It is your turn to bake a batch and reclaim your morning.
I would love to hear how yours turned out. Did you try the tropical twist or stick with the classic? Leave a comment below and tell me your favorite variation. For more easy, family-friendly recipes that actually work, follow along on Pinterest. Happy baking, friends.
Breakfast Cookies
Equipment
- large bowl
- Baking sheets
- Parchment paper
- Measuring cups and spoons
- Wire rack
Ingredients
- 2 cups rolled oats (old-fashioned or quick-cooking)
- ½ teaspoon ground cinnamon
- ¼ teaspoon salt
- 1 cup smooth almond butter or peanut butter
- ⅓ cup pure maple syrup
- ¼ cup unsweetened applesauce
- ½ cup mashed ripe banana about 1 medium banana
- ½ cup dried cranberries
- ½ cup raw pepitas (pumpkin seeds)
- ¼ cup chopped walnuts optional
Instructions
- Preheat your oven to 325°F (163°C). Line two baking sheets with parchment paper.
- In a large bowl, combine the rolled oats, cinnamon, and salt. Stir well to distribute the spices evenly.
- Add the almond butter, maple syrup, applesauce, and mashed banana to the dry ingredients.
- Mix everything together thoroughly until a thick, cohesive dough forms. You can use a sturdy spoon or your hands for this.
- Stir in the dried cranberries, pepitas, and walnuts (if using). Ensure they are evenly incorporated into the dough.
- Using a 1/4 cup measuring scoop, portion out mounds of dough onto the prepared baking sheets. Space them about 2 inches apart.
- Gently flatten each mound slightly with the back of the measuring cup or a spoon. These cookies will not spread significantly during baking.
- Bake for 16 to 19 minutes, or until the edges are lightly golden brown and the cookies are set.
- Let the cookies cool on the baking sheets for 10 minutes before carefully transferring them to a wire rack to cool completely.