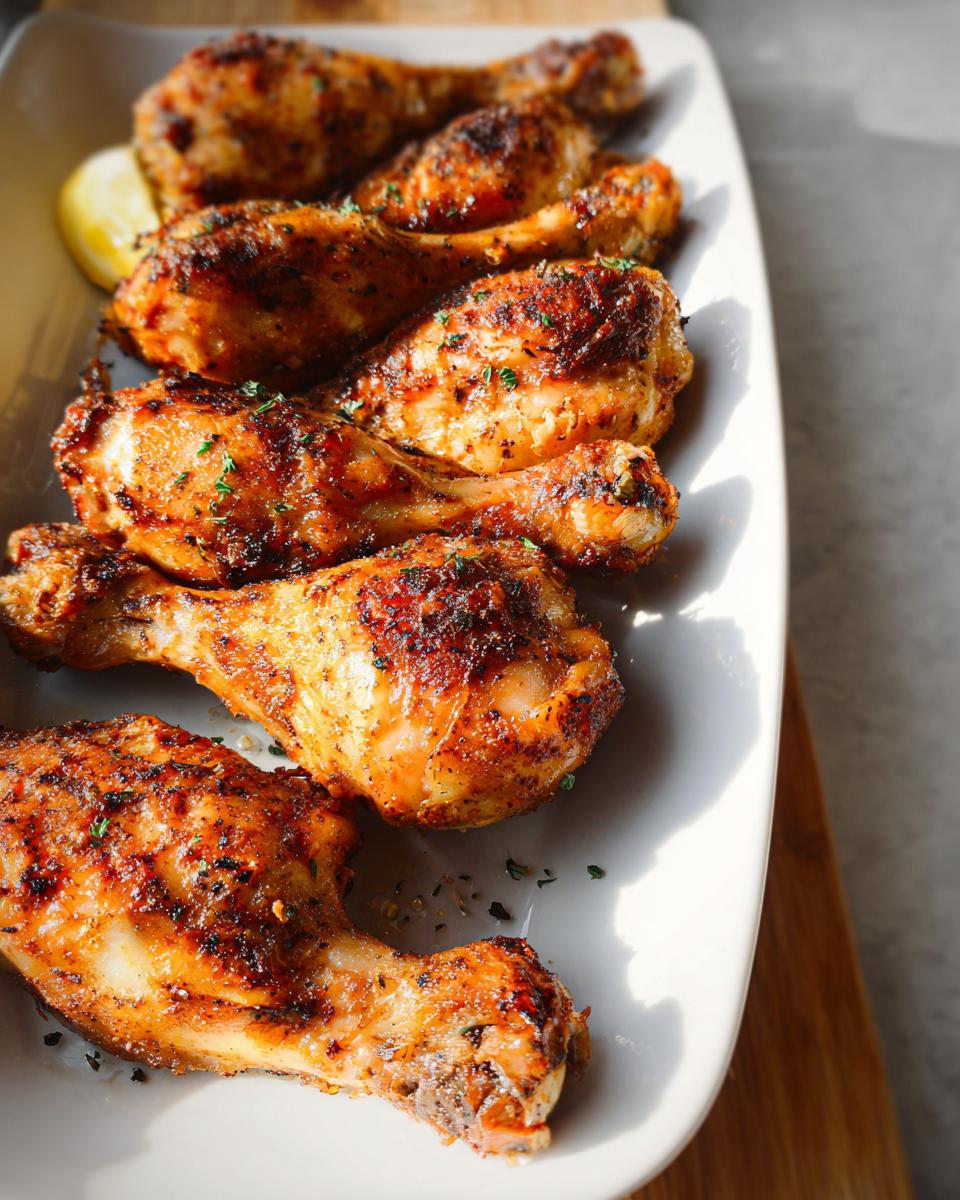
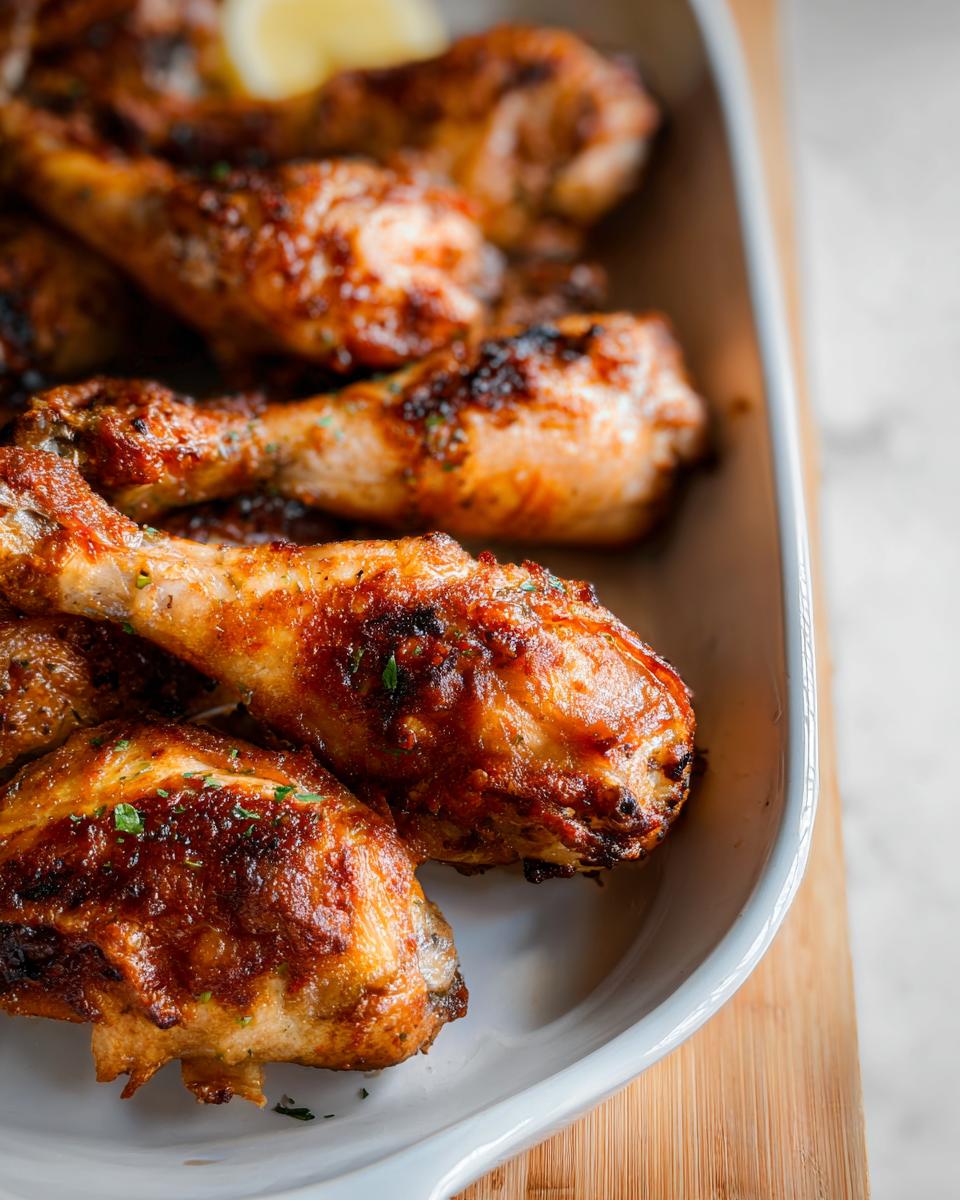
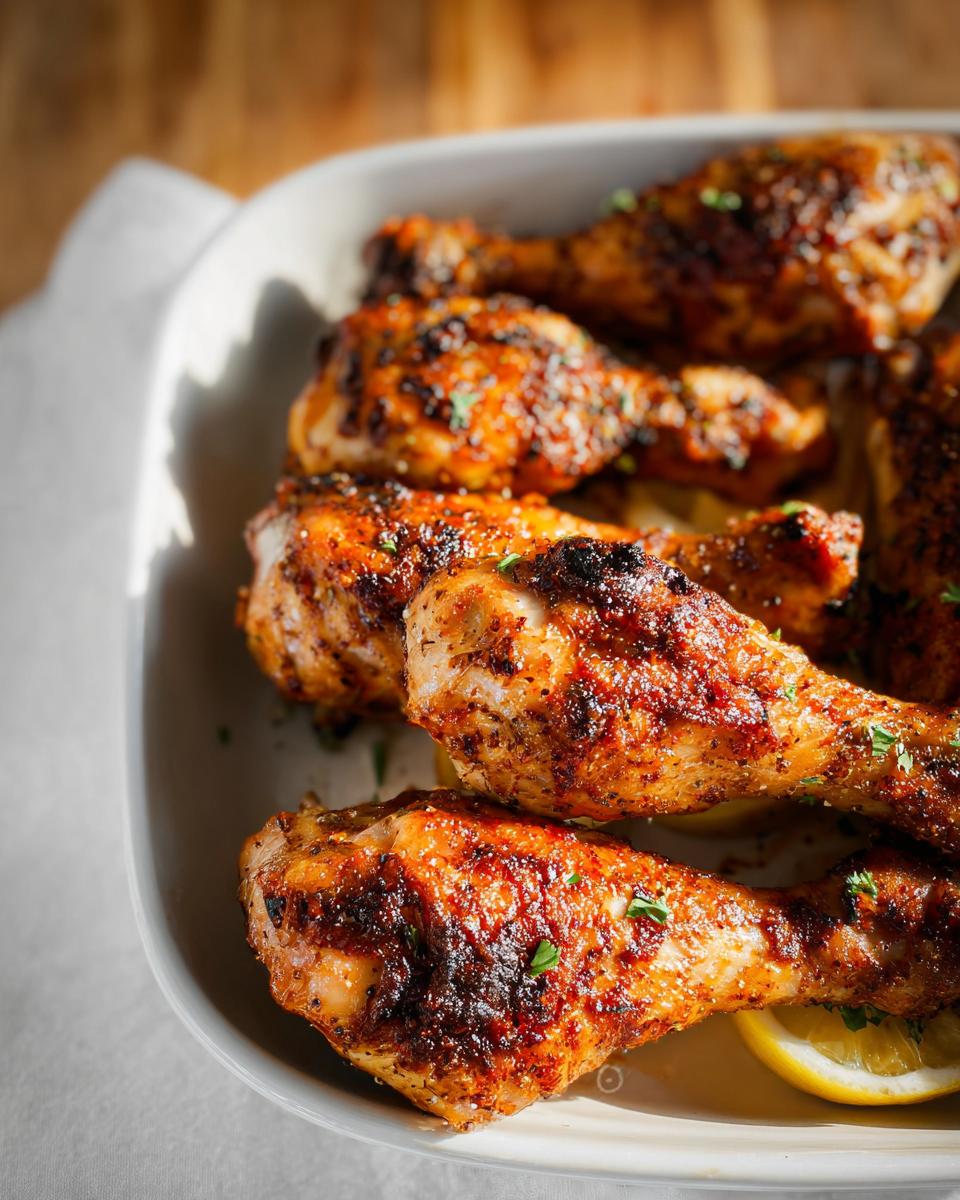
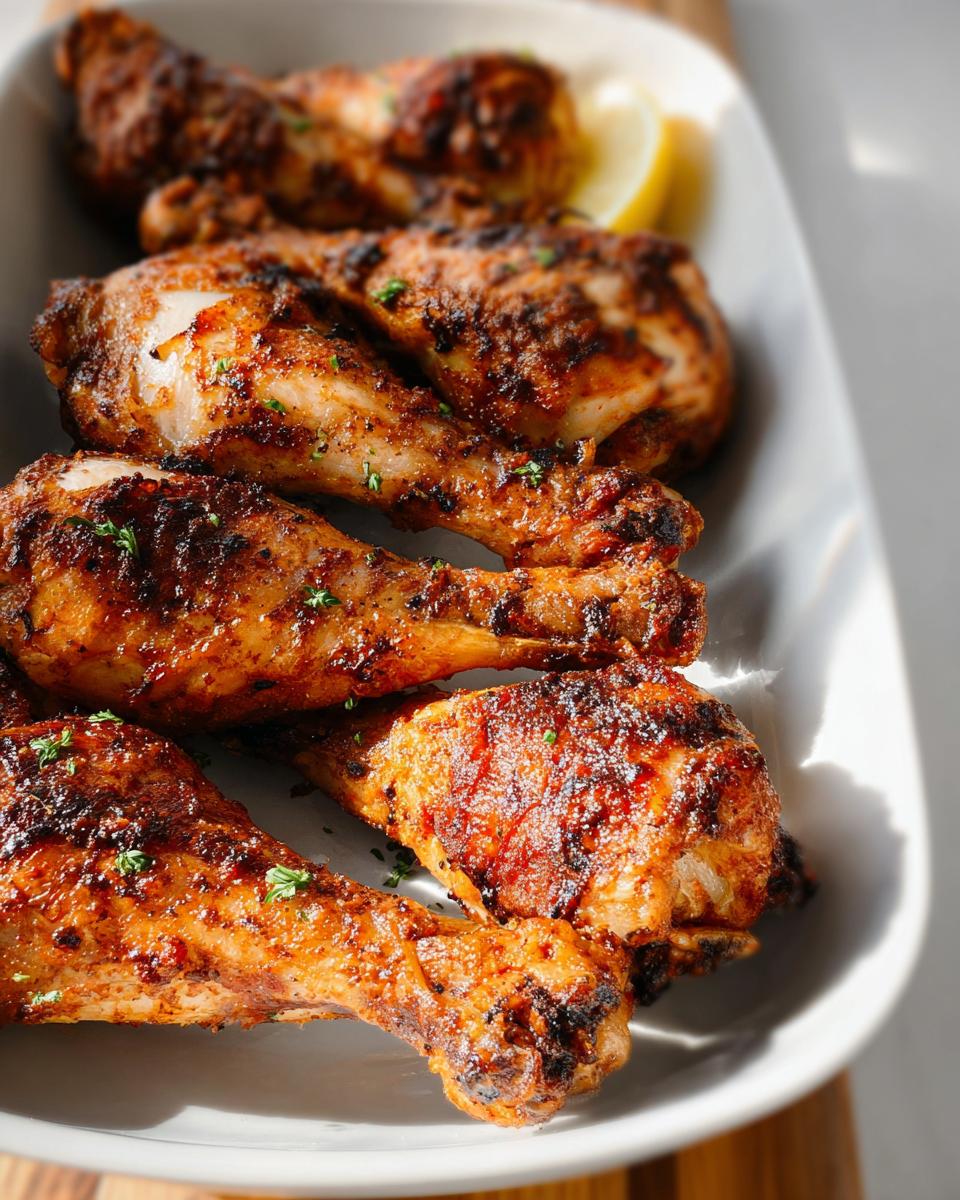
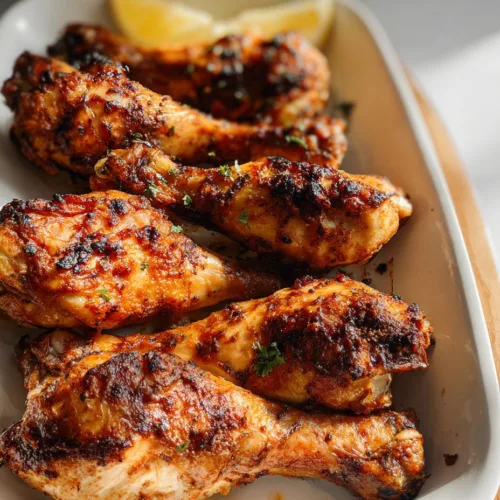
You know that feeling. It’s dinner time, the fridge is sparse, and you need something that feels like a real meal. That’s when I turn to my absolute favorite: roasted chicken legs. The secret to perfect roasted chicken legs isn’t complicated, it’s about a simple spice rub and a trusty oven. This method guarantees juicy meat and that irresistible, crispy skin we all crave. It’s the kind of easy dinner that feels special enough for a weekend but quick enough for any busy weeknight.
I learned this in my Mama’s kitchen, standing on that wobbly stool. It’s the dish I make when I want to say, “Come on in, I made too much.” Let’s walk through the recipe step by step.
Table of Contents
Why You’ll Love These Roasted Chicken Legs
This recipe is my go-to for a reason. It turns a few pantry staples into a meal that always feels like a win. Here’s why these roasted chicken legs will become your new favorite dinner.
- Effortless Elegance: With just 10 minutes of hands-on prep, you get a main dish that looks and tastes like you spent all day in the kitchen.
- Flavor Guarantee: The smoked paprika and herb rub creates a savory, slightly smoky crust that packs every bite with flavor. No bland chicken here.
- Texture Perfection: Following the simple drying and roasting steps guarantees you’ll get that crave-worthy crispy skin and tender, juicy meat inside.
- Family-Friendly: It’s a universal crowd-pleaser. My pickiest nephew and my foodie friends all ask for seconds.
- Budget-Friendly: Chicken legs are one of the most affordable cuts. This whole meal for four is incredibly kind to your wallet.
- Versatile Centerpiece: It’s perfect for a Tuesday night with mashed potatoes or a casual weekend gathering with friends. It always fits the occasion.
In short, it’s reliable, delicious, and downright simple. Let’s gather what you need.
Ingredients You’ll Need
This recipe proves you don’t need a long grocery list for big flavor. We’re using simple pantry staples to make these roasted chicken legs something truly special.
- Chicken Legs (12, about 3 pounds): Ingredient Note: Look for legs of similar size so they roast evenly. Plain drumsticks work perfectly here, too.
- Olive Oil (2 tablespoons): Ingredient Note: This binds our spice rub and is key for helping the skin get wonderfully crispy. Avocado or canola oil are great neutral substitutes.
- Smoked Paprika (1 tablespoon): Ingredient Note: This is the flavor star, giving a deep, savory base. Regular paprika works but won’t have that same warm, smoky character.
- Dried Oregano & Thyme (1 teaspoon each): Ingredient Note: These classic herbs build that cozy, aromatic depth we love.
- Garcium Powder & Onion Powder (1 teaspoon each): Ingredient Note: They distribute flavor evenly and conveniently. For a fresher kick, you can use 2 cloves minced garlic and 1 tablespoon minced onion instead.
- Kosher Salt (1 teaspoon): Ingredient Note: Kosher salt sticks to the chicken beautifully. If you’re using fine table salt, use just ¾ teaspoon to avoid over-salting.Black Pepper (½ teaspoon): The essential finishing touch.
Here’s a fun swap: If you want a different vibe, trade the smoked paprika and dried herbs for a tablespoon of a pre-made lemon pepper or Italian seasoning blend. It’s that easy to customize. Now, just measure everything out. Getting these ratios right means perfectly balanced, delicious roasted chicken legs every single time.

How to Make Roasted Chicken Legs
This is where the magic happens. I promise it’s easier than you think. Just follow these simple steps for the juiciest, crispiest roasted chicken legs of your life.
Step 1: Prep Your Oven and Pan
First, get your oven hot. Preheat it to 400°F (200°C). Doing this before anything else is a game-changer. It means your chicken starts cooking perfectly the moment it hits the pan. While the oven heats, line a large, rimmed baking sheet with parchment paper or foil. This little step makes cleanup a total breeze.
Step 2: Dry the Chicken Thoroughly
Here is the single most important step. Grab your chicken legs and a few paper towels. Pat each one aggressively until the skin feels completely dry to the touch. We need every bit of surface moisture gone. Moist skin steams in the oven. Dry skin gets gloriously crispy.
Step 3: Create the Flavor Paste
Grab a mixing bowl. Add all your dry spices first. That’s the smoked paprika, oregano, thyme, garlic powder, onion powder, salt, and pepper. Give them a quick stir with a fork. Now, pour in the olive oil. Mix it all together until it forms a thick, fragrant paste. Mixing the dry stuff first stops any clumpy bits.
Step 4: Coat the Chicken Legs
Add your perfectly dried chicken legs to the bowl with that beautiful paste. Now, get your hands in there. Toss and massage the paste onto every part of each leg. Make sure the coating is nice and even. A spoon works if you don’t want messy hands, but I find hands do the best job.
Step 5: Arrange for Perfect Cooking
Take your seasoned legs and place them on your prepared baking sheet. Give them some personal space. Arrange them in a single layer and make sure they are not touching. This space lets the hot air circulate all around each piece. That circulation is what gives you that all-over golden brown, crispy skin. Crowding the pan creates steam and soggy skin.
Step 6: Roast and Flip
Slide the pan into your hot oven. Let the chicken roast, undisturbed, for 25 minutes. This gives the first side a chance to really crisp up and brown. After 25 minutes, use a pair of tongs to carefully flip each leg over. Flipping exposes the other side to direct heat for even crisping.
Step 7: Finish Roasting and Check Temperature
Let the chicken roast for another 15 to 20 minutes. The total time will depend on the size of your legs. Do not guess when they are done. Always use a meat thermometer. Insert it into the thickest part of the meat, avoiding the bone. You are looking for an internal temperature of 165°F (74°C). The skin should be a deep, golden brown and sound crispy when tapped.
Step 8: Rest Before Serving
When your chicken hits the right temperature, take the pan out of the oven. This next part requires patience. Let the roasted chicken legs rest right on the pan for about 5 minutes before you dig in. This short rest lets the hot juices settle back into the meat. If you cut in right away, all those delicious juices will run out, leaving the meat dry. Trust me, it’s worth the wait.
Pro Tips for the Best Roasted Chicken Legs
After making this recipe more times than I can count, I’ve picked up a few tricks that make a big difference. These simple pro tips will take your roasted chicken legs from great to absolutely unforgettable.
- Start at Room Temp: After you pat the legs dry, let them sit on the counter for about 20 minutes. Taking the chill off reduces the temperature shock in the oven. This helps the meat cook more evenly from edge to center.
- Your Thermometer is Your Best Friend: Never, ever guess. A quick-read digital meat thermometer is the only way to guarantee juicy, safe chicken. Insert it into the thickest part, avoiding the bone. Pull the legs at 165°F for perfect doneness every time.
- Crispiness Rescue: If the skin looks good but not quite crackling-crisp when the chicken is done, don’t worry. Just turn your oven up to 425°F and roast for an extra 3-5 minutes. Keep a close eye on it. This quick blast of high heat works wonders.
- Make the Rub Your Own: This spice blend is a perfect base. For a kick, mix in ¼ teaspoon of cayenne pepper. For a sweet-savory twist, add a teaspoon of brown sugar to the rub. It creates a beautiful, lightly caramelized glaze.
- Allison’s Secret: For the most flavorful skin, I sometimes gently loosen it from the meat with my fingers before drying and seasoning. This lets the spice paste get underneath, flavoring the meat directly and making the skin extra tasty.
Remember, great cooking is about little adjustments. Use these tips to make this easy recipe truly yours.
Common Mistakes to Avoid
We’ve all been there. A simple slip can change how a dish turns out. Knowing these common pitfalls with roasted chicken legs will set you up for crispy-skinned, juicy success every single time.
- Skipping the Drying Step. Why it happens: You’re in a hurry and just want to get the chicken in the oven. How to fix it: Take that extra minute. Pat each leg aggressively with paper towels until the skin feels completely dry and the towels come away clean. Dry skin is non-negotiable for crispiness.
- Crowding the Pan. Why it happens: You’re trying to fit everything on one sheet for easy cleanup. How to fix it: Give those legs some breathing room. If they’re touching, use a second pan or a larger sheet. Space allows hot air to circulate for even browning. Crowding creates steam and leads to soggy skin.
- Not Using a Thermometer. Why it happens: You think you can tell by looking or by cutting into it. How to fix it: Trust the tool. A simple digital meat thermometer takes the guesswork out. Insert it into the thickest part of the meat, avoiding the bone. Pull the chicken at 165°F for perfectly safe, juicy meat. Don’t panic if you don’t have one yet. Just know that getting one is the best $15 you’ll spend for your kitchen.
- Serving Immediately. Why it happens: Everyone is hungry and the chicken smells amazing. How to fix it: Show that chicken a little patience. Let it rest on the pan for a full five minutes after it comes out of the oven. This lets the hot juices settle back into the meat. If you cut in right away, all those flavorful juices will end up on the plate, not in your bite. The chicken will still be plenty hot, I promise.
Delicious Variations
One of my favorite things about this roasted chicken legs recipe is its flexibility. Once you master the basic method, you can play with the flavors to match any mood or season. Here are a few of my go-to twists that always feel like a brand new meal.
- Bright Lemon Herb: Swap the dry spice rub for a fresh blend. Mix 2 tablespoons olive oil with the zest of one lemon, 1 tablespoon chopped fresh rosemary, and 2 cloves of minced garlic. The bright, herby aroma is perfect for spring.
- Spicy Buffalo Style: Roast the legs with just oil, salt, and pepper. As soon as they come out of the oven, toss them in a bowl with a mix of 3 tablespoons melted butter and ¼ cup of your favorite buffalo sauce. Serve with celery sticks and ranch dressing.
- Sweet & Smoky BBQ Glaze: Follow the main recipe up until the last 10 minutes of roasting. Then, brush each leg generously with your favorite BBQ sauce. Return to the oven to let the glaze caramelize and get sticky. Watch closely to prevent burning.
- Savory Garlic Parmesan: Create a paste with 2 tablespoons olive oil, 3 cloves minced garlic, 1 teaspoon dried parsley, and ½ cup finely grated parmesan cheese. The cheese will form a golden, crispy crust as it roasts.
Don’t be afraid to mix and match. Cooking should be fun, and these variations prove how one simple technique can lead to countless delicious dinners. For more chicken recipes, check out our collection.
Serving Suggestions
These roasted chicken legs are a complete meal all on their own, but pairing them with the right sides turns dinner into an occasion. Here’s how I love to serve them, depending on the day and the crowd.
For a simple weeknight dinner, I keep it cozy. A sheet pan of crispy roasted baby potatoes cooked alongside the chicken is my favorite lazy move, plus a quick green salad with a sharp vinaigrette to cut through the richness.
Planning a summer cookout? These legs are a star. Serve them with classic sides like sweet corn on the cob, a tangy vinegar-based coleslaw, and chunks of cold watermelon. It’s a plate full of sunshine.
When you need a comfort food meal, go all in. Creamy, buttery mashed potatoes are a must for soaking up the juices. I add a pile of simple steamed green beans or roasted carrots for a touch of freshness.
For a lighter lunch, skip the heavy carbs. Fluff up a big bed of leafy greens or a hearty quinoa salad with chopped veggies. Place a warm or cold chicken leg right on top for a satisfying protein boost.
Remember, these roasted chicken legs are versatile. They shine as the main event but also work beautifully as part of a bigger spread with other grilled meats at a holiday or potluck. No matter how you serve them, just be ready for empty plates.
FAQs About Roasted Chicken Legs
Can I use chicken thighs instead?
Absolutely. Bone-in, skin-on thighs work great. They are richer and may need an extra 5-10 minutes of roasting time. Always use your meat thermometer to check for 165°F at the thickest part.
How do I store and reheat leftovers?
Let the chicken cool completely, then store it in an airtight container in the fridge for up to 3 days. To reheat, use an oven or toaster oven at 350°F until warm. This keeps the skin crispy, unlike the microwave.
Why is my chicken skin not crispy?
The number one reason is not drying the skin enough before roasting. Pat it aggressively with paper towels until it’s completely dry to the touch. Also, avoid crowding the pan, as steam is the enemy of crispiness.
What are the nutrition facts for this recipe?
One serving (about 3 chicken legs) provides approximately 220 calories, 25g of protein, and 12g of fat. Please note, nutrition can vary based on the specific brands and sizes of ingredients you use.
Can I prep this recipe ahead of time?
Yes. You can dry and season the chicken legs up to 4 hours ahead. Place them on the sheet pan, cover loosely, and refrigerate. If the skin feels damp when you’re ready to cook, give it one more quick pat with a paper towel before roasting.
Your New Favorite Chicken Dinner
So there you have it. The secret to perfect roasted chicken legs is now yours. It’s a simple path to that golden, crispy skin and tender, juicy meat we all dream about. This recipe is your new kitchen sidekick for busy weeknights, lazy weekends, and hungry crowds. I truly hope it becomes a staple in your home, just like it is in mine.
Give it a try this week and let me know how it goes in the comments below. I love hearing your stories and seeing your photos. For more easy, family-friendly dinner ideas that never skimp on flavor, come join the fun over on Pinterest. Happy cooking!
Perfectly Roasted Chicken Legs
Equipment
- Large baking sheet
- Parchment paper
- Paper towels
- large bowl
- Meat thermometer
Ingredients
- 12 chicken legs (about 3 pounds)
- 2 tablespoons olive oil
- 1 tablespoon smoked paprika
- 1 teaspoon dried oregano
- 1 teaspoon dried thyme
- 1 teaspoon garlic powder
- 1 teaspoon onion powder
- 1 teaspoon kosher salt
- ½ teaspoon black pepper
Instructions
- Preheat your oven to 400°F. Line a large baking sheet with parchment paper.
- Pat the chicken legs thoroughly dry with paper towels. This step is crucial for achieving crispy skin.
- In a large bowl, combine the olive oil, smoked paprika, oregano, thyme, garlic powder, onion powder, salt, and pepper. Mix well to create a flavorful paste.
- Add the dried chicken legs to the bowl and toss them to ensure each piece is evenly coated with the spice mixture.
- Arrange the seasoned chicken legs in a single layer on the prepared baking sheet, making sure they are not touching each other.
- Roast for 25 minutes.
- Flip each chicken leg over.
- Continue roasting for another 15 to 20 minutes, or until the internal temperature of the chicken reaches 165°F on a meat thermometer, and the skin is golden brown and crispy.
- Let the chicken legs rest for about 5 minutes before serving.